Setup
Setup a server of your choice. The commands in this tutorial will be for Ubuntu Server 22.04 but the steps should be the same. Here are the specifications I use for my templates.
You cannot decrease the hard disk so choose something low (20-50 GBs). You can increase after cloning.
- Disks
- Disk size (GiB):
50
- Disk size (GiB):
- CPU
- Sockets:
2 - Cores:
4 - Total cores:
8(sockets x cores)
- Sockets:
- Memory
- Memory (MiB):
4096(4 GB) - Minimum memory (MiB):
1024(1 GB)
- Memory (MiB):
Configuring
After logging in (console or ssh, preferably ssh) run these commands.
1
2
3
4
5
6
7
8
# update and upgrade system
sudo apt-get update -y && time sudo apt-get dist-upgrade -y

# removes host ssh files
sudo rm /etc/ssh/ssh_host_*

# zeroes out the file, makes it a blank file
sudo truncate -s 0 /etc/machine-id
If you want your new VMs to come preloaded with certain config files, etc. now’s the time to do so. Some things I like to do is install the QEMU Guest Agent and change my console font and size.
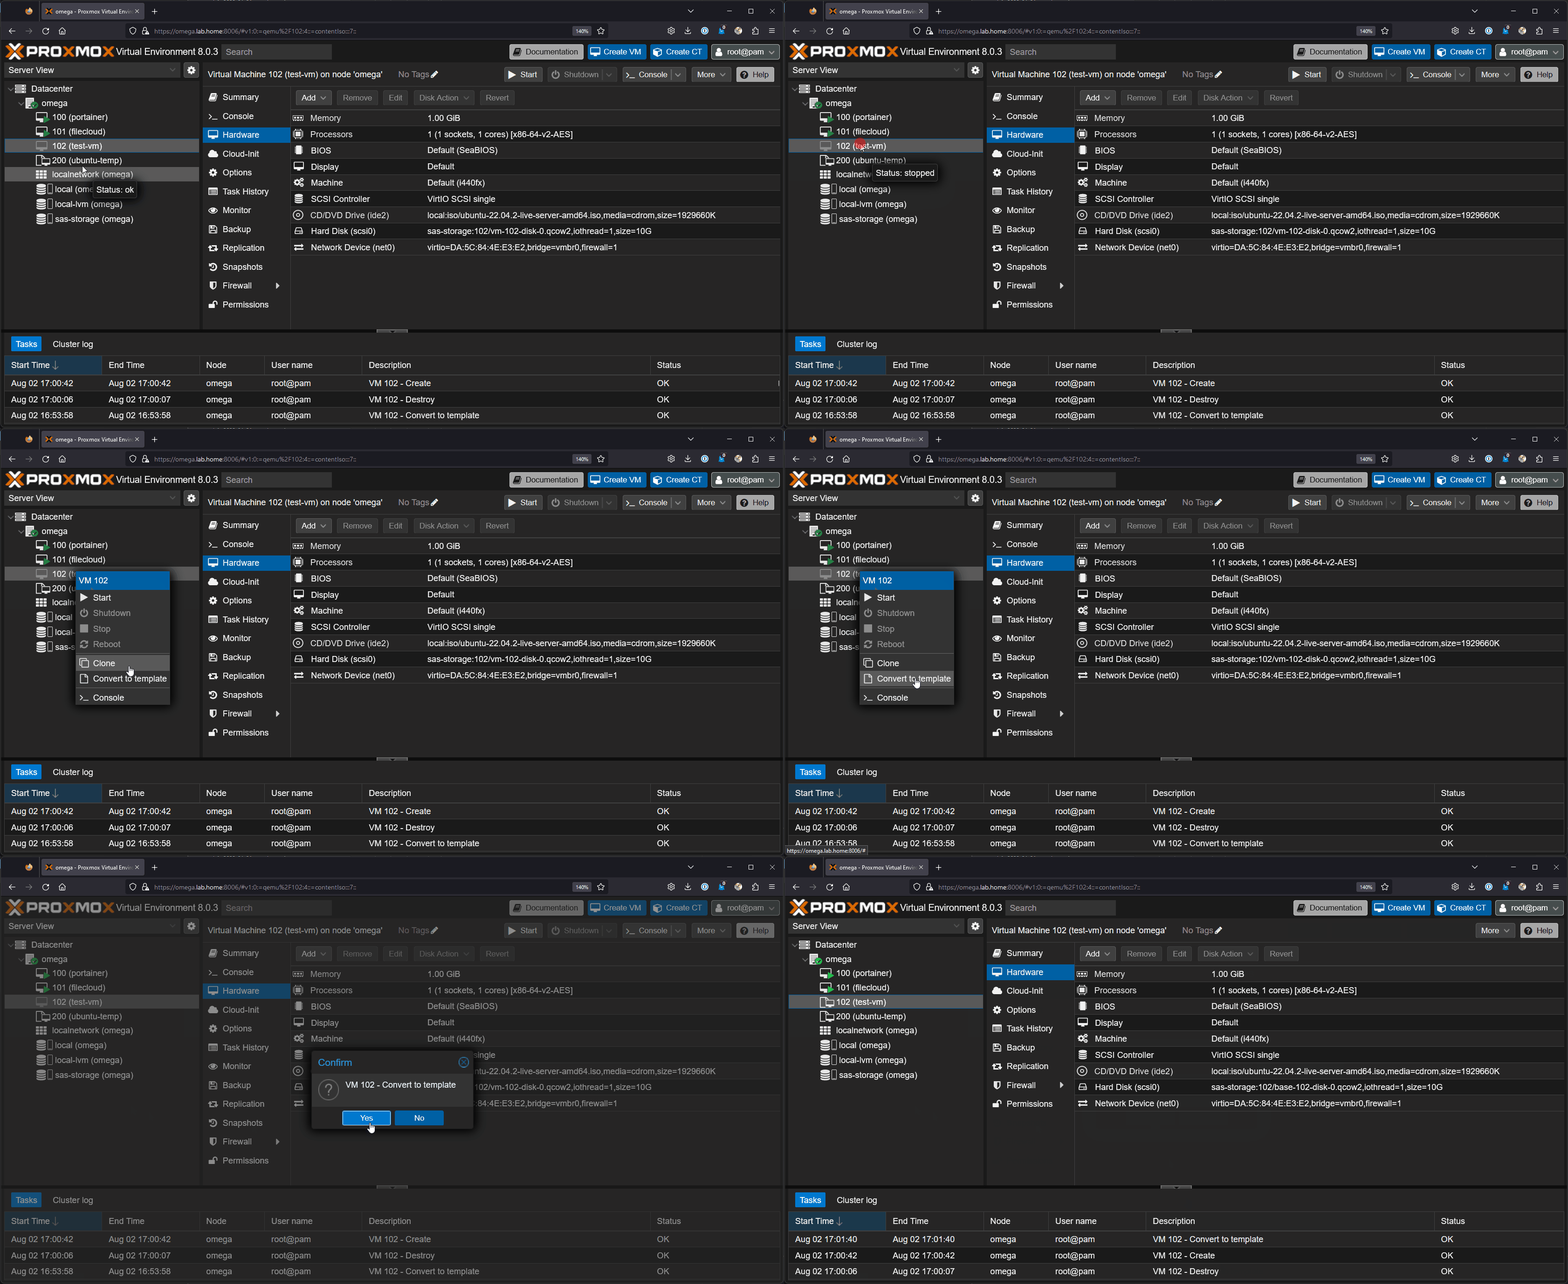
Covert to template
This step is permanent and cannot be undone.
Shutdown your VM and go back to Proxmox. Right click on the VM you just created and click Covert to template. You officially have a template. There’s a couple more steps I want to show you but you’re essentially done.
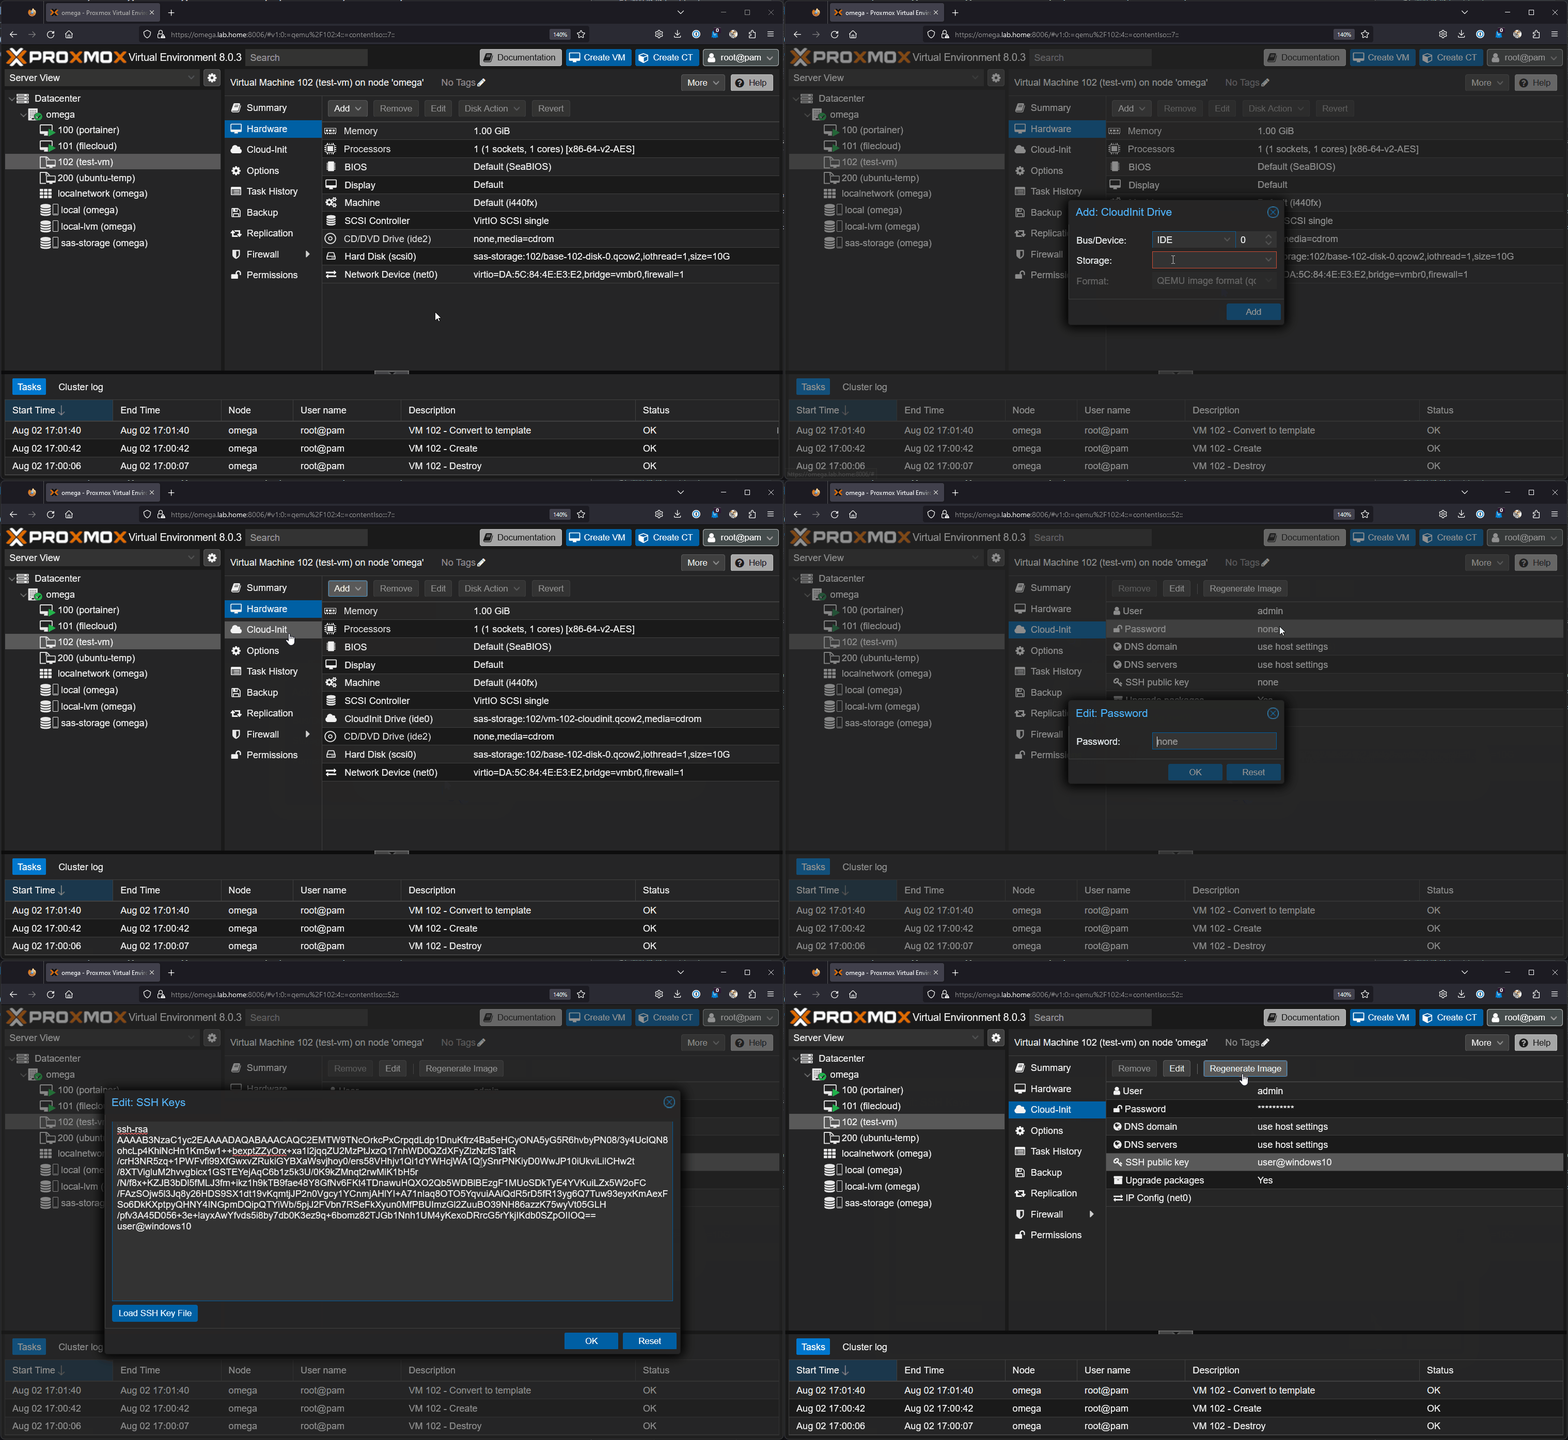
Remove Media
I like to remove the Ubuntu ISO by navigating to the Hardware tab and setting CD/DVD Drive(ide2) to Do not use any media.
Cloud-Init
Last step is to configure Cloud-Init. Navigate to the Hardware tab and add a CloudInit Drive. Next go to the Cloud-Init tab and add your default user/password as well as your public SSH key. Once complete, click Regenerate Image.
Cloning
After cloning, you’ll need to change your hostname. Edit the two files below and reboot.
/etc/hostname/etc/hosts


